Showing posts with label How to. Show all posts

Oct 2, 2011

How to Remove or Hide the Blogger Blogspot Navigation Bar

I've been looking for a way to remove the Blogger navigation bar from the topmost portion of this little blog of mine.   I got it when I chose to use a simple and classic Blogger template.

My reason for removing it?  Well, I just don't want my Blogger blog to be obviously seen as a Blogger blog.  He-he-he!  Dont get me wrong.  Having a navigation bar in there is pretty handy sometimes.  But most of my friends say that this bar makes my obvious blogspot blog a blogspot blog.  Got it?

Removing or hiding it is easy actually.

Jul 24, 2011

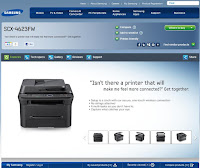
Samsung SCX-4623FW : Configuring on Wireless Mode

Samsung SCX-4623FW wireless printer configuration and installation of Samsung SCX-4623fw on a wireless network the solution to the problem of installingAs what I've published a few days ago, I got this problem on installing and configuring our Samsung SCX-4623FW printer.  Installing it as a local printer is not an issue as it can be done in a "cinch".

Just today, I have finally been able to install it as a wireless printer!   And I am posting this here so that others can be guided as well.

Here it goes:

Installing Samsung SCX-4623FW as a Wireless Printer on a Wireless Network

Jul 16, 2011

Configuring a 2Wire ADSL Wireless Modem as a Wireless Router or as an Access Point

I have been asked by my friends on how to use back an old 2Wire ADSL Router.   Honestly, I do not know how to do it.   I got an old one in the office so I had tried to do some testings and configurations myself.  A practice config so to speak.

I was able to do it correctly.  He-he-he!

And since most of those who asked are not as "techy", I had put-up a step-by-step procedure with pictures.   Let me start...

How to Configure a 2Wire ADSL Wireless Modem as a Wireless Router or as an Access Point

I am assuming that the 2wire router that you have is an ADSL Wireless Router.  And that it is currenly connected to modem via lan cable.  If what you have is just a DSL Modem type - no wireless - then this procedures does not apply.

Jun 20, 2011

How to make All Links to Open in a New Tab or Window in Blogger Blog

I have been wanting to do this :  I want to open all links in a new tab.  My reason?  I just want the homepage to remain open while your guys open and read the contents of a link in a new tab or window.  At least by setting this up like this, you don't have to type the homepage url again just to go back to the homepage.

Jun 8, 2011

Color Code for Crimping Cat5, Cat5e or Cat6 cables

I am an accountant by profession.  I am currently holding around 12 companies under my fingers.  But in one way or another, I am bound to help my teammates.  One of these ways is helping them with the computers.  Then there comes connecting their computers into the LAN network.  And so on...


Yesterday, I had to re-crimp a LAN cable as it seemed to have a "loose contact" in one end.  You may think crimping a LAN cable is way too far away from an accountant's work.  But if you take a look at it closely, you'll see how easy it is.

The main thing with crimping a LAN cable is that you know the color codes.  You splice, and slot in the cable unto the RJ45 jack.  Tighten it... and its done!  I assume you know that a crimper is need here, of course.

Feb 24, 2011

Email Subscription or Feeds for a Specific Category or Label in Blogger

This little blog of mine has a simple email subscription widget in my sidebar.  If you like what I'm doing and you wanted to be kept posted on everything I blog, you can actually just subscribe to my blogs.  Upon doing this, you can receive all updates on any article that I publish in my blog.

A nice idea, right?
You will have the luxury of checking my blog through your emails.

But what happens if you as the  avid reader only wants to receive updates on specific "labels" or "categories" only?  This question often arises on Blogs with no specific niche - just like JackDi.com of course.  He-he-he!

I have actually asked myself about this too.

And right now, I have finally found the answer!  All we need to do actually is just to find your blog feed url or blog feed address of that specific category or label.

Here is what you should do:

____________________________________

Email Subscriptions or Feeds 
for a Specific Category or Label 
in Blogger
____________________________________

Dec 1, 2010

How to Disable COPY AND PASTE in your Blog

I have just came across with something interesting to me being a newbie blogger.  It's all about preventing others to COPY-and-PASTE your own blog's content.   You might say that my blog contains nothing that precious.  And you can be right about that.  But I will apply it to my blog anyway.  He-he-he!

Here is how it is done.

<!-- Disable Copy and Paste-->
<script language='JavaScript1.2'>
function disableselect(e){
return false
}
function reEnable(){
return true
}
document.onselectstart=new Function (&quot;return false&quot;)
if (window.sidebar){
document.onmousedown=disableselect
document.onclick=reEnable
}
</script>


Just insert the above script anywhere in between <head> and </head> tag.
In my case, I inserted it just before "</head>".

And that should do it.

However, this doesn't really give you a 100% guarantee that you content "cannot be copied or stolen".  Some  geeks can still do it.  But we are just making it just a little harder for them.


Oct 12, 2010

How to Change your Blogger Icon

How to Change or Customize your Blogger Icon

Every time you create a Blogger account, the default icon will be Blogger's icon  (this one on the right).  And I believe most bloggers like me would want to change it.  My primary reasons is to have a unique identity logo or identity icon for my blog even if its a sub-hosted by Blogger.

Noticed the icon that appears in the tab of your browser?  Yeah, the blue colored "J" ! That is my customized identity icon.  And I made it myself!  I'm not a Pro graphics designer.  You don't have to be either.  Anybody can make it actually.


Here's how:

1. Prepare an image that you would consider to be your identity icon / logo.  

Oct 9, 2010

ASCII Chart of Symbols - part 2

ASCII Chart of Symbols
(part 2)

This is a continuation list of my preferred ASCII Chart of Symbols and Characters.  For the first partial listing, please click here :  ASCII Chart of Symbols - Part 1


Again, to generate these symbols or characters, your must :

• press and hold the "Alt" key down

• type the numbers in from the numeric keypad on the right side of the keyboard

• then let go of the buttons ...and the character will appear.


I have not included those characters that can be pressed in the keyboards directly.  I had also excluded those almost-useless-to-common-guy characters.   Like this character for example: "   " and " "  .  Unless your are a programmer, characters like these are of no use to a common guy.

Here is the second part of the list:

127          A house shaped pentagon
129     Ã¼     A u with a umlaut (or diaeresis) over it
130     Ã©     Acute accent over e
145     Ã¦     The lower case vowel grapheme of the a and e
146     Ã†     Capitol AE combined into one letter
154     Ãœ     a "U" with a umlaut (or diaeresis) over it
155     ¢     The "cents" or "cent" sign for currency
156     £     The "pound sign" for currency
157     ¥     The "Yen" sign for currency (Japanese/Chinese)
158          Pts Points of Pints sign
159     Æ’     A curvy or italic F (italicized)
160     Ã¡     An a with a acute accent

Oct 8, 2010

ASCII Chart of Symbols - part 1


ASCII Chart of Symbols and Special Characters
(Part 1)

Once in a while, I would use some symbols in my reports and documentations.  Squared symbol, Cube symbol, a music note, one-half, one-forth, etc.  Common computer keyboards do not have any of these special characters.  Fortunately, we could actually make it appear in our text document by pressing a combination of keys.  We will use ASCII Codes!  For definitions, history and the blah-blah-blah stuffs of ASCII, please check WikiPedia.  I only want the codes.  He-he-he!

Personally, my favorite symbols are as follows:
½   ¼      ²         «   »   Ã‘   Ã±   ¢


To generate these symbols or characters, your must:

•  press and hold the "Alt" key down

•  type the numbers in from the numeric keypad on the right side of the keyboard

•  then let go of the buttons ...and the character will appear.

You have basically done a good magic trick!  ☺ ☺ ☺

Try to experiment on it first.  Sometimes, the characters does not appear correctly because of some sort of timing.  Keep using it, so you will get the hang of how it's done.

Dont expect me to list down those that you can directly press in your keyboards.  I only wanted the symbols & characters to be listed here.  So here is the first part:

1.         White Smiley
2.         Black Smiley
3.           Black heart
4.           Diamond
5.           Clove (Clover/Puppyfeet)
6.           Spade
7.         Black dot
8.           Black square with circle cutout
9.           White circle White circle
10.         Black square with black circle
11.        Male Symbo
12.        Female Symbol
13 .        Eigth Note
14.        Musical Double Eigth Note
15.       Sun
16.       Play (Forward) or Solid right arrow
17.       Rewind (Backward) or Solid left arrow
18.          Up and down arrows
19.         Double Exclamation Mark
20.         Pilcrow (Paragraph Sign)
21.   §      The section sign
22.       Long and Thick Minus Sign
23.          Up & down arrows
24.          Up arrow
25.          Down arrow
26.       Right arro
27.       Left arrow
28.       90º degree angle
29.       Left and right arrow
30.       Solid up arrow
31.       Solid down arrow


For the 2nd part, kindly click here :  ASCII Chart of Symbols - Part 2


Oct 2, 2010

HTML Color Code Generator

  
Recognizing colors is definitely easy.  A person can identify colors right away by just looking at it.  But in website development, there is a big twist.  Almost all websites, including blogs, use HTML color codes to use specific colors.  We can always use the  HTML Color Code Chart (posted earlier).  Browse over to see which colors you would like to apply into your blog or website.

Another faster option is use an HTML Color Code Generator.   Here it is, try it!

HTML Color Code Generator

The HTLM Color Code Chart


I have been looking for some ways to improve the looks of this newbie blog of mine. I wanted to add a personally identity to my blog. First thing i thought of is the color.  So, for reference purposes, I will publish here the color code chart for html. All you need to do is copy the code excluding the "#" and past it into where you like it to be in your page.

Alternatively, you can also use the HTML Color Code Generator.


HTLM Color Code Chart


COLOR NAMECODECOLOR
Black#000000
Grey0#150517
Grey18#250517
Grey21#2B1B17
Grey23#302217
Grey24#302226
Grey25#342826
Grey26#34282C
Grey27#382D2C
Grey28#3b3131
Grey29#3E3535
Grey30#413839
Grey31#41383C
Grey32#463E3F
Grey34#4A4344
Grey35#4C4646
Grey36#4E4848
Grey37#504A4B
Grey38#544E4F
Grey39#565051
Grey40#595454
Grey41#5C5858
Grey42#5F5A59
Grey43#625D5D
Grey44#646060
Grey45#666362
Grey46#696565
Grey47#6D6968
Grey48#6E6A6B
Grey49#726E6D
Grey50#747170
Grey#736F6E
Slate Grey4#616D7E
Slate Grey#657383
Light Steel Blue4#646D7E
Light Slate Grey#6D7B8D
Cadet Blue4#4C787E
Dark Slate Grey4#4C7D7E
Thistle4#806D7E
Medium Slate Blue#5E5A80
Medium Purple4#4E387E
Midnight Blue#151B54
Dark Slate Blue#2B3856
Dark Slate Grey#25383C
Dim Grey#463E41
Cornflower Blue#151B8D
Royal Blue4#15317E
Slate Blue4#342D7E
Royal Blue#2B60DE
Royal Blue1#306EFF
Royal Blue2#2B65EC
Royal Blue3#2554C7
Deep Sky Blue#3BB9FF
Deep Sky Blue2#38ACEC
Slate Blue#357EC7
Deep Sky Blue3#3090C7
Deep Sky Blue4#25587E
Dodger Blue#1589FF
Dodger Blue2#157DEC
Dodger Blue3#1569C7
Dodger Blue4#153E7E
Steel Blue4#2B547E
Steel Blue#4863A0
Slate Blue2#6960EC
Violet#8D38C9
Medium Purple3#7A5DC7
Medium Purple#8467D7
Medium Purple2#9172EC
Medium Purple1#9E7BFF
Light Steel Blue#728FCE
Steel Blue3#488AC7
Steel Blue2#56A5EC
Steel Blue1#5CB3FF
Sky Blue3#659EC7
Sky Blue4#41627E
Slate Blue#737CA1
Slate Grey3#98AFC7
Violet Red#F6358A
Violet Red2#E4317F
Deep Pink#F52887
Deep Pink2#E4287C
Deep Pink3#C12267
Deep Pink4#7D053F
Medium Violet Red#CA226B
Violet Red3#C12869
Firebrick#800517
Violet Red4#7D0541
Maroon4#7D0552
Maroon#810541
Maroon3#C12283
Maroon2#E3319D
Maroon1#F535AA
Magenta#FF00FF
Magenta1#F433FF
Magenta2#E238EC
Magenta3#C031C7
Medium Orchid#B048B5
Medium Orchid1#D462FF
Medium Orchid2#C45AEC
Medium Orchid3#A74AC7
Medium Orchid4#6A287E
Purple#8E35EF
Purple1#893BFF
Purple2#7F38EC
Purple3#6C2DC7
Purple4#461B7E
Dark Orchid4#571B7E
Dark Orchid#7D1B7E
Dark Violet#842DCE
Dark Orchid3#8B31C7
Dark Orchid2#A23BEC
Dark Orchid1#B041FF
Plum4#7E587E
Pale Violet Red#D16587
Pale Violet Red1#F778A1
Pale Violet Red2#E56E94
Pale Violet Red3#C25A7C
Pale Violet Red4#7E354D
Plum#B93B8F
Plum1#F9B7FF
Plum2#E6A9EC
Plum3#C38EC7
Thistle#D2B9D3
Thistle3#C6AEC7
Lavendar Blush2#EBDDE2
Lavendar Blush3#C8BBBE
Thistle2#E9CFEC
Thistle1#FCDFFF
Lavendar#E3E4FA
Lavendar Blush#FDEEF4
Light Steel Blue1#C6DEFF
Light Blue#ADDFFF
Light Blue1#BDEDFF
Light Cyan#E0FFFF
Slate Grey1#C2DFFF
Slate Grey2#B4CFEC
Light Steel Blue2#B7CEEC
Turquoise1#52F3FF
Cyan#00FFFF
Cyan1#57FEFF
Cyan2#50EBEC
Turquoise2#4EE2EC
Medium Turquoise#48CCCD
Turquoise#43C6DB
Dark Slate Grey1#9AFEFF
Dark Slate Grey2#8EEBEC
Dark Slate Grey3#78C7C7
Cyan3#46C7C7
Turquoise3#43BFC7
Cadet Blue3#77BFC7
Pale Turquoise3#92C7C7
Light Blue2#AFDCEC
Dark Turquoise#3B9C9C
Cyan4#307D7E
Light Sea Green#3EA99F
Light Sky Blue#82CAFA
Light Sky Blue2#A0CFEC
Light Sky Blue3#87AFC7
Sky Blue#82CAFF
Sky Blue2#B0E2FF
Light Sky Blue4#566D7E
Sky Blue#6698FF
Light Slate Blue#736AFF
Light Cyan2#CFECEC
Light Cyan3#AFC7C7
Light Cyan4#717D7D
Light Blue3#95B9C7
Light Blue4#5E767E
Pale Turquoise4#5E7D7E
Dark Sea Green4#617C58
Medium Aquamarine#348781
Medium Sea Green#306754
Sea Green#4E8975
Dark Green#254117
Sea Green4#387C44
Forest Green#4E9258
Medium Forest Green#347235
Spring Green4#347C2C
Dark Olive Green4#667C26
Chartreuse4#437C17
Green4#347C17
Medium Spring Green#348017
Spring Green#4AA02C
Lime Green#41A317
Spring Green#4AA02C
Dark Sea Green#8BB381
Dark Sea Green3#99C68E
Green3#4CC417
Chartreuse3#6CC417
Yellow Green#52D017
Spring Green3#4CC552
Sea Green3#54C571
Spring Green2#57E964
Spring Green1#5EFB6E
Sea Green2#64E986
Sea Green1#6AFB92
Dark Sea Green2#B5EAAA
Dark Sea Green1#C3FDB8
Green#00FF00
Lawn Green#87F717
Green1#5FFB17
Green2#59E817
Chartreuse2#7FE817
Chartreuse#8AFB17
Green Yellow#B1FB17
Dark Olive Green1#CCFB5D
Dark Olive Green2#BCE954
Dark Olive Green3#A0C544
Yellow#FFFF00
Yellow1#FFFC17
Khaki1#FFF380
Khaki2#EDE275
Goldenrod#EDDA74
Gold2#EAC117
Gold1#FDD017
Goldenrod1#FBB917
Goldenrod2#E9AB17
Gold#D4A017
Gold3#C7A317
Goldenrod3#C68E17
Dark Goldenrod#AF7817
Khaki#ADA96E
Khaki3#C9BE62
Khaki4#827839
Dark Goldenrod1#FBB117
Dark Goldenrod2#E8A317
Dark Goldenrod3#C58917
Sienna1#F87431
Sienna2#E66C2C
Dark Orange#F88017
Dark Orange1#F87217
Dark Orange2#E56717
Dark Orange3#C35617
Sienna3#C35817
Sienna#8A4117
Sienna4#7E3517
Indian Red4#7E2217
Dark Orange3#7E3117
Salmon4#7E3817
Dark Goldenrod4#7F5217
Gold4#806517
Goldenrod4#805817
Light Salmon4#7F462C
Chocolate#C85A17
Coral3#C34A2C
Coral2#E55B3C
Coral#F76541
Dark Salmon#E18B6B
Salmon1#F88158
Salmon2#E67451
Salmon3#C36241
Light Salmon3#C47451
Light Salmon2#E78A61
Light Salmon#F9966B
Sandy Brown#EE9A4D
Hot Pink#F660AB
Hot Pink1#F665AB
Hot Pink2#E45E9D
Hot Pink3#C25283
Hot Pink4#7D2252
Light Coral#E77471
Indian Red1#F75D59
Indian Red2#E55451
Indian Red3#C24641
Red#FF0000
Red1#F62217
Red2#E41B17
Firebrick1#F62817
Firebrick2#E42217
Firebrick3#C11B17
Pink#FAAFBE
Rosy Brown1#FBBBB9
Rosy Brown2#E8ADAA
Pink2#E7A1B0
Light Pink#FAAFBA
Light Pink1#F9A7B0
Light Pink2#E799A3
Pink3#C48793
Rosy Brown3#C5908E
Rosy Brown#B38481
Light Pink3#C48189
Rosy Brown4#7F5A58
Light Pink4#7F4E52
Pink4#7F525D
Lavendar Blush4#817679
Light Goldenrod4#817339
Lemon Chiffon4#827B60
Lemon Chiffon3#C9C299
Light Goldenrod3#C8B560
Light Golden2#ECD672
Light Goldenrod#ECD872
Light Goldenrod1#FFE87C
Lemon Chiffon2#ECE5B6
Lemon Chiffon#FFF8C6
Light Goldenrod Yellow#FAF8CC


I do hope you will find this charge useful.


Sep 2, 2010

The secret LINKS - SEO technique

As you have noticed a few weeks ago, i put up a Link List in the lower right panel of my blog site. I listed some websites - most of them not even related to my blog.  Maybe you thought this list is just nuisance.

Guess what, I actually put it there on purpose.

I've came across an article about Search Engine Optimization or SEO.  And this is one of the best techniques listed in the article.

As per Wikipedia, SEO is a process or a way of improving the visibility of a website in search engines via the natural or unpaid search results.  There are many ways to do this.  Examples are putting meta tags, headers, alt tags, back links, etc.  SEO is directly related with PageRank or PR. This so called PR is what Google uses to determine the importance of a website - a measure of importance.  If your SEO technique is good, your PR should also be good.  Good PR means top rank in search results.  Top search result means good traffic to your website.  And that's what we want!


If you make a Google search on the certain word, the first few websites in the search result is understood to have a   very hight PageRank.

Linking to other websites is also one way of doing this -- back links.  Literally speaking, the more website who are back linking with you, the more trusted your website becomes.  This back links turn out to become a positive vote to your website.  It's considered a good PR point.


You might ask why i need to put the links i my blog site (or website) when we should focus on making our site to be placed or posted in somebody else's site.  The thing is,  it's a give-and-take situation.  If you want me to put your website link in mine, you should also place my link in yours.

I wanted my blog site to at least be seen in somebody's Google search.  That's why i'm doing this Link List.

But how did i do it?  Where do we find some website to link to and and to link from?  I'll make your life easy.  See below some good options for you:
Ultimate Link Building
Banklinks
Link Building Black Book
Dominate Google!
How to get a TOP 5 Ranking on Google and Yahoo

What are you waiting for?
:)

Aug 18, 2010

Proudly Pinoy!

Hi guys!

Did you notice a new logo at the upper right side corner of my blogsite?  It is a Proudly Pinoy! logo.

Here are some facts about the logo:


What's This Logo?
Mabuhay! This "Proudly Pinoy" logo expresses pride in being Filipino. It is available for all Filipino designed or owned websites. If you are a Filipino or have a Filipino site, please support this project and express your pride of being Pinoy, by posting this logo on your Pinoy site or blog! 

Who May Use It?
Anyone who is proud to be Pinoy may use this logo on their website. It is free to use for both personal and business websites. The only requirements are (1) do not modify the logo except resizing, and (2) link the logo back to this site, so that when someone clicks on the logo, they can see this website.

How To Use the Logo?
It couldn't be easier to add the logo to your Pinoy blog or website. Choose from large, medium, or small sizes, and white or transparent backgrounds. Find the code (from below) to copy and paste onto your blog or website. 

For blogger, you just go to the Design tab.  Then click Add Gadgets, then HTML/Java Script.  From there, you paste the code that you copied from below.  Save.  Done!  :)

 For more choices on the logo, click here.


Large

Medium

Small


How Did This Come About?
This logo, created by Joe Talisic, and now owned by www.ProudlyPinoy.org, was one of the entries in a hugely successful competition which ran from Independence Day thru July 19, 2007. Read about the judging, or browse the competition archive with 297 entries. 


I'm a certified Pinoy and I am very proud of it!

Wanna put it in your website too?

Aug 15, 2010

How to Add a Like Facebook Button in Blogger

Just like other newbies, i am also constantly finding ways to improve this little blog of mine.


So, i thought of putting something like the other blogs are using: the "Facebook Recommend Button".
Here's how to do it in Blogger:

1)  As usual, you need to login into your blogger account.  Click on the "Design" tab, then click "Edit HTML".

2) Look for the "Expand Widget Template" and be sure to tick the checkbox.

3) Highlight the following script and press Ctrl+C.  You are right!  You need to copy this script:

<b:if cond='data:blog.pageType == &quot;item&quot;'> 
<iframe allowTransparency='true' expr:src='&quot;http://www.facebook.com/plugins/like.php?href=&quot; + data:post.url + &quot;&amp;layout=standard&amp;show_faces=false&amp;width=100&amp;action=like&amp;font=arial&amp;colorscheme=light&quot;' frameborder='0' scrolling='no' style='border:none; overflow:hidden; width:450px; height:40px;'/>
</b:if>

4) Now look for <data:post.body/>. Fastest way to do this is to press Ctrl+F. Just type it in the search/find bar. Ding! Found it in a fraction of a second! If not, then you must have skipped step 2, haven't you?

5) Position the cursor exactly next to <data:post.body/> and press Ctrl+V. You are right again, we are trying to paste the above copied script to this specific location.

6) Click on the "Save Template" button.

There you go!
Check your blog pages. You should be able to see the results.

7) The above procedure will show the "Like Facebook Button" on post pages only. If you want it to be shown after all posts, then, just delete the part of the script in gold color.

Haha!
Easy, right?

Well, i hope this helps.
Happy blogging.

Aug 14, 2010

Free SMS to Philippines from your blogs or websites.

Hello Folks!

I came across with a very good iStoryan who had just established a website that allows you to send SMS FREE to any cellphone carrier in the Philippines.  The moment i knew about this, i quickly integrated it here in my blog.

Do you want to put it in your websites or blogs too?
Here's how:

1)  Check it out first.  Go to this website:  LibrengTeks.com
See if you are comfortable using it.  Try to send one or two SMS message/s to yourself (if you are from Philippines).  One thing you need to consider is if your phone provider is online.  If it is, then there shouldn't be any problem.  Just a few seconds, and there it goes!  If it is offline, then you will receive the sms message with a little delay.

2)  Know where the XML is located.  You like it?  Do you want to integrate it in you blog like i do?  Click HERE.  You should be able to see something like scripts or codes.  But you only need the URL and not the codes themselves.

3)  You actually don't need the XML file by itself.  You only need the URL or the web address where the XML file is being hosted.  Click on the address bar and copy the URL.  (Just highlight it and do a Ctrl+C to copy).

Alternatively, if you really want the script, here it is:


4)  Go to your blog.  In my case, i used blogger.  Log-in and click the "Design" tab.  The screen should look like this: 
5)  Click on "Add Gadget".  A small window like this one below will pop-up.

6)  Click on "Add You Own".  There should be slot there where you can write the URL of the gadget.   Press Crtl+V on your keyboard.  (You did press Ctrl+C as per step 3 above, right?).  This will paste the URL of the gadget.  The window should look like this:

7)  Final stage is to click the "Add By URL" button.  And then press Save.
8)  Human!  There you go.  Check out your blog to see how it goes!
Can you see the same gadget at the right side of my page?


Their should be something like this in your sidebar


I thought you would say it is easier to do than you think it is.
I'm a newbie blogger and i said so also.
Ha-ha-ha!


-----------
Special Thanks to LT Admin of LibrengTeks.com  and iStorya.net.